Monday, February 28, 2011

Shabby Tea Room Challenge as interpreted by The Stamping Boutique

The challenge for today's Shabby Tea Room was to create an elegant project inspired by this photo - using Red, Black and white (or cream).

I would love to have a white kitchen ... This red gives the perfect pop to this, too. 

Since The Stamping Boutique is sponsoring this challenge for the Shabby Tea Room, I had to use this Magic of Pretend digital image with the little girl having Tea with her Teddy.

I used my Copics to color this beauty with a little bit of my prismacolored pencils and Gamsol for the dress/bows.  The background is nearly covered, but hope you can see that I used last week's Splitcoast Stampers technique of creating a Bargello pattern.  I basically laid 3 strips of red, white and black papers in a row then cut them into strips the other way & attached them by offsetting slightly to create a 'V' pattern.  I went with a half-inch strip, but I may try it again using a quarter inch strip for a more striking effect (as well as a better repeat of the pattern).  Very clever technique!

I used black as my mats as well as for the Sizzix flourish.  Look close and you'll see some rhinestones attached to the teapot lid, sparkles and the tips of the flourish as well as black gems in the corner.  Had to finish this one off with the red satin bow ...

What do you think?  Would love to hear!

Sunday, February 27, 2011

Splitcoast's Virtual Stamp Night

This last Friday and Saturday, Splitcoast Stampers had their You Make My Heart Sing VSN Challenges ... I think I only missed 2 of them.  The premise behind these Virtual Stamp Night challenges is that they post the challenge at the top of the hour and you have 45 minutes to MAKE your card, then a few to photo-edit it & get it posted.  Not to worry if you can't sit near the computer for an extended length of time (like I did for most of Friday and Saturday) - You can pull the challenges and complete them, as long as you stick with the 45 minutes assembling them (you're on the Honor system here).  These cards need to be posted on Splitcoast no later then Monday, February 28th at 8:00 pm.

1st up is this card we made following a sketch based on the fact that our heart has 4 chambers.  After all the ga-zillions of cards out there, amazing to see refreshing sketches.  I used the new Baby Blossoms 2-step set for this - the background paper is digital from Bearly Mine.

This next card was made  with the inspiration of our Wedding song.  I chose Elton John's "Your Song". 

I quickly found the lyrics to the song and printed them on some digital designer paper for the back panel.  The dress was stamped in grey (I wanted a softer palette).  I used a light touch with the prisma colored pencils and Gamsol to give it just a subtle color.  Failry quick card - hardest part was to printe the lyrics and designer paper in time.

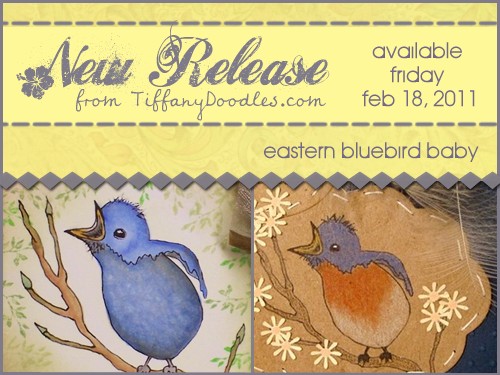
For this next card, we were supposed to incorporate a bird or something bird-related.  I had a picture in my head of how this would look.  A little disappointed that the designer paper is so busy.  Love the idea behind it, but not super fond of it.

Here, we were to use 2 different techniques on our one card.  I dry embossed the background paper with a checkerboard folder, then sponged over the embossing becuase it was barely noticeable.  The 2nd technique I incororated was to do a faux tile technique.  I scored the white paper into 'tiles' and then stamped the tree image on top, taking care not to press so hard, so the image would sit 'on top' of the grid lines.  I did make a boo-boo, coloring too deep into the iamge, but amost things are fixable.  Here, I just took my white gel pen and traced into the 'grout line'.  Can't even tell.  The image is from Stampin Up's Lovely Tree and the sentiment is from their Full of Life set.

 Wish I'd had a clue on this one beforehand ... Challenge was to make a card with a "Little Red Dress" on it, in honor of the February being Heart Disease Awareness month. 

Yep, it's the same dress as above.  Change here is that I stamped the dress directly onto the red cardstock with black embossing powder then highlighted with a bit of white gel pen. 

For this next card, we used the Soot technique.  Never have tried this before, and I kind of know why.  While I LOVE my crd, the idea of lightingn paper on the fire was a bit daunting.  I didn't have the acrylic sealer and my initial tries turned into a fingerprinters nightmare, so I checked online and found a reverse soot technique. 

I took the glossy cardstock, turned upside down (OVER A SINK WITH WET PAPER TOWEL IN THE SINK) and then used a candle, barely touching the cardstock but getting the paper blackened with a kind of cool pattern of the black.  Since it was my first time, I was a bit sparing on the soot (nevermind that my 1st piece of glossy cardstock DID, in fact, catch on fire - Hence the reason for OVER the sink with a wet napkin in the bottom.  Ok, back to the technique --- After the paper was 'sooted' up, I took an image and stamped off with Versamark, which sealed in the darker soot color.  I then took a cotton ball and softly wiped around the entire panel to get the excess soot off.  They called this Reverse Soot technique on the internet.

For this card, we had to come up with a card based on our favorite childhood toy or experience.  I had to go down this path bexcause of a lavendar quilt I had as a youth.  I took Paper Trey's Guilde Lines paper pack and cut out strips then cross-strips til I got squares where I laid them out with a pattern.  This little girl is Chloe from Whipper Snapper that I colored with Copics. 

For this card, we needed to incoporate some sheet music.  I have one more small piece of this music dp - it's either hit the store time, or break out my background stamp of sheet music.  Because of the sheet music, I made a computer generated sentiment to honor the You Make My Heart Sing challenge chickista's. 

Because all the other samples are thus far pretty and frilly, I tried to stay true to a masculine card (notice knot vs bow ... notice color combo is typically for a male).  I stamped images from Gina K's Botanical's direcly onto Suede cardstock before sponging/distressing the panels.

This card had to have some Vellum and embossing on it.  I just got this pale gold powder so wanted to give it a go.  It's very pretty in real life, but couldn't get it to translate well on the computer.

I used the "Bliss" set from Stamping Up for the sentiment and the image panels.

"Love begins with a smile,

grows with a kiss,
and ends with a teardrop."
~~ author unknown ~~

For this inspiration challenge - I chose this poem - My thoughts behind it are ... 1) you meet, 2) become attached, 3) sometimes have to say "Good bye".  I was reminded of all the soldiers who have to leave their loved ones to serve in the military, so I made this "Miss You" card.  This Penny Black hedgie was colored with Copics.  I like the way the corner tie turned out, as well as the placement of the yellow Stickles around the outer border.

 For this card, they challenged us to take a background stamp that we don't use very often and incorporate that into the card.  I took my BG stamp of wheat/grass and made a main image panel that I matted on some script designer paper.  To bring a spark of whimsy into the card, I added these fun gel dew drops to the sentiment panel.


 Do you remember the song "Wild Thing" ... They posted the lyrics in the challenge and I couldn't believe it was so short, but sure enough ... all those years ago (and sometimes even today), we just keep repeating ourselves over and over when singing this. 

I heard 'wild thing' and instanly thought of this monster - he's a digital image from the Digi Shack, alongside the sentiment from My Graphico.  He was colored with Copics as well.  Because it's a monster card, I wanted to keep the embellishments to a minimum, but it needed the buttons.

Can you guess what prompted this card?  You're right - create a card relating to food or the kitchen.  I'm not sure if I've ever used this set since I HAD TO HAVE IT last year, so here goes - I just saw the movie Julie and Julia again and thought Bon Appetit!  I barely colored this chef with Copics on vanilla.  Kept the rest of it pretty simple as well. 

My last card for the challenges was done with the "thumping" technique.  Never heard it called this before - but we learn new things every day.  The stamp is stamped with your 'base' color and then you use markers (Zig, Stampin Up, etc.) to 'thump', or add additional color to the image - I was precise and tried to shade the image at the shadow points.  I think I went a bit light on the petals w/the coordinating 'thump' color, but I do lilke the way this one turned out, too, espcially the ribbon and the branches peeking out.

So, what do you think ?  Was it worth me losing my entire Friday and nearly all of Saturday to make these cards?  Love to hear what you have to say!

Take Care!

Thursday, February 24, 2011

Stamps R Us - For the Girls sponsored by Sassy Studio

This week at Stamps R Us, the challenge is "For the Girls", sponsored by Sassy Studio Designs

I was immediately drawn to this My Fair Lady image - one of my fave movies - and who couldn't love Audrey Hepburn?! 

She was colored with Copics (C00,1,3, E40,42, R81,83, W00,1).  I sponged an oval using a negative from a Nesties die, using Tim Holtz' Antique Linen.  I wanted to keep this one fairly "clean" because the dress is so striking, but I had to add some faux stitching, a rhinestone brad and some teeny pink pearls.  The designer paper is from Basic Grey (of course, lol).  The sentiment is from Verve - if SHE's not special, not sure who is, lol.  Had to tie in the ribbon with the dress - I love the way pink and black look together.

Thanks for stopping by -
if you get a chance, head on over to
Stamps R Us - the "For the Girls" challenge runs until March 6th!

Monday, February 21, 2011

Beginner's Guide to Digital Stamps using Word by Tiffany Doodles

For another fun tutorial - using Digital Images in Word, check out Tiffany Doodles' Blog post here.

Paper Piecing Tutorial by Tiffany Doodles

For a fun way to paper piece Digital images, please check out Tiffany Doodles' Blog post here.  Tiffany makes it pretty easy to achieve a very unique look to your digital images.

Saturday, February 19, 2011

The Stamping Boutique Bunny Blog Hop

Are you ready for some fun ? 

Spring is just around the corner

(I hear if I say it 3 times and click my heels together with my eyes closed, then it'll be true!)

If you've arrived from Colleen's The Smart Stamper, then you're on the right track ... This is Stop #5 along The Stamping Boutique's Bunny Blog Hop starting today.  If you've skipped in here in the middle, you can check out the Blog Hop List below and start at Amanda's blog.

The Stampin Boutique Design Team was challenged to come up with a card (or two) using some of the wonderful digital images drawn by Tracey Malnofski and available at The Stamping Boutique.  The trick was to create something that would put you in the mood for Spring.  Heck, this wasn't a challenge for me AT ALL - I've been in the mood for Spring since our last Blizzard, which I must point out - after only 2 weeks has turned into a soggy, mushy, dirty remnant of the fluffy white stuff from February 2nd.  Sorry, I sidetrack myself ...


Enough to say "COME ON SPRING!"

With that said, here's the sketch challenge the Design Team used to create their wonderful cards.  Why don't you give it a try to see what you can come up with ... Tracey has some fabulous Spring additions to her line.


This is what I came up with for my contribution to Spring Fever ... It's the flower cart recently released.  I colored with Copics and tweaked with some Stickles to make the flowers sparkle.  I added some glossy accents to the hearts, wheels and umbrella points.  These rosettes are from Stampin Up that I dyed with Copics R20 & R85.  I'm loving this new Stampin Up designer paper - old fashioned/vintage prints have my name ALL over them!  The sentiment is from a Hero Arts set.

Now, for the goodies ... There's a prize at the end of the line ... You'll have to make sure you hop to every design team blog. Make sure you post on EACH blog post for The Stamping Boutique to be eligible for the prize - ALL 4 or the New Spring Images.


At the Stamping Boutique, there will be an Inlinkz where you can post your comment after you have completed hop! From this list, the winner will be chosen randomly!

You have until 7pm (EST) Sunday night (2/20/11) to post your card at The Stamping Boutique's site to be elibible for the random prize draw.  Good Luck !

Next along the Springy Path, you'll visit Crystal here.

Here is the blog hop order from front to back ... Please check them all out.  Tracey's Design Team loves to hear feedback!


Hoping Spring IS, in fact, just around the corner!
Thanks for hopping by ...

Friday, February 18, 2011

Sneak Peek #4 and New Release Tiffany Doodles


Last day of the Tiffany Doodles new Bird Sneak Peeks ....
This is another digital image from Tiffany Doodles that I know you'll love to color!

The Tufted Titmouse
Today is also the day that all of these Sneak Peek bird images we've been sharing can be found in the Tiffany Doodles store.  Here is what I came up with for this wonderful Tufted Titmouse.  I colored him with Copics and sponged I sponged the inside of the frame for this Nestie with tea dye, leaving the small white border.  The sentiment is from Hero Arts, framed the same way.  Because of the detail of the bird and the berries, I didn't want a whole lot going on elsewhere on the card.   I did dye this ribbon rosette with saffron which looks wonderful, I think.

Remember to check out the store - Tiffany Doodles is having a sale -
buy all 5 new release birdies and get 10% off the total price - well worth it !

Thursday, February 17, 2011

Sneak Peek Day 3 at Tiffany Doodles

Today, Tiffany Doodles is giving you a Sneak Peek of the Yellow Throat

Look what some of the designers have come up with ... Be sure to check out Tiffany Doodles' site here tomorrow for the full release.  There's a couple more surprises for tomorrow, as well !

In the meantime, this is the card I made with the Common Yellow Throat image.

I've been seeing a couple of pairs of Cardinals out in the back yard lately -
I'm SO looking forward to seeing and hearing some more birds singing soon - Where is my Spring ?!

Kiddo's have 5 day weekend (Institute & Columbus days).  Ah, to be young again and subject to days off left and right ... Alas, I have Pharmacology and CPR certification for the better part of the day.  Hoping to see some Copic or Prisma action afterwards, lol.

So, let me know what you think of these new Bird Beauties! 
Check out Tiffany's Design Team to see who's created what w/these new birds. 
Make sure to leave a comment - I love to hear what you have to say.
Take care!

Wednesday, February 16, 2011

Sneak Peek Day 2 at Tiffany Doodles

Today's sneak peek is of the Warbler available as a Digital image at Tiffany Doodles. 

When I first loaded this bird, I went in search of Warbler's for ideas in coloring - HOLY COW!!!  Seriously?  Almost anything goes.   I think this bird is what killed my Copic W00, which, while sitting empty waiting for the Various refill to come in the mail got knocked on the floor by the cat then chewed on by the dog ... Danged animals!  Now I have to buy a new W00 ... none of the local scrap/stamp stores carry the lower end colors.

I digress - I know, SHOCKER!

Anyway, here's the graphic for the Warbler sneak peek - the Design Team had so much fun sharing what they've doen with these images - tune in to the DT members from the side bar if you want to see even more of these images. 

And here is what I came up with - the Cerulean Warbler, colored with Copics.

I just love the way the chocolate fits in with the blue on this Warbler.  What do you think?

Don't forget - This image (along with 4 other avian images) will be released on Friday, November 18th for the mass consumption at Tiffany Doodles.Com


Tuesday, February 15, 2011

Sneak Peak Bluebirds from Tiffany Doodles

Guess what's cooking in Tiffany's Studio - Yep ... Bluebirds ... Here's a sneak peek of the Bluebird Couple.  You can see some of the cards that have been made up with this image.

Aren't they sweet?  This image and 4 other new avian images will be released THIS Friday, February 18th, so make sure to check out Tiffany Doodles Store then.

In the meantime, here's another sneak peek of the Baby Bluebird

As well as the card I made using this image.  I know Bluebird baby's aren't all blue ... they're actually rather drab and brown looking - even the ones that grow up to be the beautiful bluebirds, but I took some license with this image and made him a mottled blue baby bluebird. 

Make sure you come back each day this week to see the sneak peeks of the rest of the images that Tiffany will be releasing this Friday.  In the meantime, check out this sale on the birds if you buy them all in a package.

Head on over to Tiffany Doodles Store now to see what else she has.
Remember, the birds will go on sale this Friday, February 18th.

Tell me what you think of this Bluebird Couple and the Baby Bluebird.

Monday, February 14, 2011

Frolicking Fairies for Splitcoast's TLC 312

Oh my ... After a long day at school, stamping was just what the doctor ordered ... However, I don't think his prescriptions said to do the Technique Lover's Challenge over at Splitcoast Stampers today.

The challenge was to create a "Pull Out Shadow Box Card" ... What's that, you say?  Well, here's a tutorial from 2008 from Karen over at Stampingvideos.com on how to create it ... May I make a suggestion ahead of time?  When she says practice with copy paper - Do it, :)

This was my 3rd try.  Thank goodness I didn't put the image inside the box until I was done and pleased with the box.  The image is a digital from The Stamping Boutique, Frolicking Fairies, that I colored with Copics.  I added some yellow Stickles to the flower centers for a pop of sparkle.  It's hard to see, but I also doodled some of the sparklies and little fairies with some clear glitter gel pen. 

The sentiments were created from the computer.  I left the outside a little plain because I wanted the person who gets this card to open it up to a Surprise - hence the sentiments inside.  Because the card is folded and inside a wrap, I kept the dimension inside to a minimum, so once punched, I just sponged around the sentiments before attaching them.

I added a scalloped strip of Basic Grey paper to the outer flaps.  The wrap was made with a strip of celery and the same designer paper on the outer flaps from Basic grey, also scallop punched, but it's difficult to see because of the color of the dp against the celery.  I punched a disk of the same dp and matted on a scalloped circle of garden green.  To that, I finished it off with a pretty cream paper flower.

While I'm loving Basic Grey's designer paper, this may not have been the best choice for all the folds because of it's being heavier duty paper.  I'd recommend a thinner paper - Stampin' Up's would be perfect, or something comparable with 2 sided pattern.

Well, while I did get frustrated a bit, it was still very therapeutic to spend the afternoon working on this card.

Thanks for stopping by for a look-see.
Love to see what you think.

Sunday, February 13, 2011

Sunday Sketch & Stamp Challenge

Today over at Sunday Sketch & Stamp Challenge, The Stamping Boutique is sponsoring Challenge #47 - Either follow the sketch provided or make a card with no corners - in other words, round or oval.

I tried to use parts of their sketch in my card with the 2 circles and the cross piece even if it is a little bit different.  I used one of Tracey's new images from The Stamping Boutique, the Windmill, which I colored with Copics.  The paper is from BoBunny (cross piece is just flipped over of background paper.  I finished this off with some soft yellow pearls and a flourish.  Sentiment is from Hero Arts that is popped up on another white before layering on the scallope tango mat.  Beneath this cardfront is a circular card base just inside the lines of the orange layer.

What fun!  I need challenges like this to get me out of my A2 rut sometimes.


Have a great day!

Saturday, February 12, 2011

Etsy Inspired Challenge 12 February 2011

Today's challenge over at the Etsy Inspired Challenge blog is to scan the many items available in Glowgirl16's shop.  This gal has tons of coupon organizers and totes that she's made with some fabulous fabric.  Check out her etsy shop for some inspiration and then head over to The Stamping Boutique as they're sponsoring the Etsy Inspired Challenge this week.  Tracey has tons of super cute digital images in her store - you won't be disappointed.  Once you pick an image, make a card, scrapbook page or any other project you can think of and upload it to the Etsy Inspired Challenge blog!

Here is the sample I chose from Glowgirl16's shop as my inspiration:


And here is how I interpreted her vision into my card ...  I used one of Tracey's newer images, She Who Paints the Forest, and colored her with Copics.  Added a bit of clear glitter gel pen to her wings and some lipstick spica to the berries for a bit of sparkle to the card. 

I love this small rosebud print dp (which I almost covered up entirely, go figure) and am so bummed that it seems to be the last piece which has no identifying markers on it ... gotta learn how to make my own papers, lol ...

Ahh, to be able to do ALL I want to do, I'd need 48 hours in a day - with no sleep.

I'm off to a Volleyball tournament -
makes for a very long day when they only play every other match of 3 games.
Looks like I'll be bringing some pharmacology homework with me.
Happy, Happy, Joy, Joy

Leave a comment to let me know what you think of the card.  Have a great day!