Tuesday, November 30, 2010
A Little of This and That
For my first attempt, I got a little carried away, so ended up putting the light grey into the grout lines. The background image is the Victorian Lace from Stampin Up. I used Marina Mist to color and shade, then a C1 copic to shadow the edges even further. The image is from Winter Wonderland, again stamped in Marina. I wanted to keep it fairly monochromatic, so just aded some gold Stickles to the sun and icicles to the snowflakes.
I'm happier with my second attempt. I used the same background stamp and Marina Mist once again. This time I was careful to keep the white grout lines. Sentiment is from Verve's Richly Blessed set. I embossed the oval after punching and sponged around the inside with Marina before added a couple of half pearls. I like the way this cream ribbon stands out - white would have gotten swallowed up.
For an alternative Faux Tile technique using embossing powders and a brass stencil, check out a psuedo tutorial I did back in June that you can Find Here .
And, just for fun, I was monkeying around with my new Tilda image from Magnolia ... She was colored with Copics then I added some glossy accents to the ornament as well as some Stickles to the flourish for some sparkle. For the DP, I used the Stampin Up's Blueberry crisp designer paper. Behind Tilda, I stamped snowflakes from the Snow Burst set to bring in a winter theme. Sentiment is from Stampin Up's Bells 'n Boughs set.
Thanks for popping by ... Hope you all have a wonderful week.
Sunday, November 28, 2010
The Stamping Boutique's 12 Days of Christmas
Tracey Malnofski of The Stamping Boutique released the images found in this book last year. I wasn't introduced to digital images until the middle of this year, so I missed out ... and as soon as I saw these in her store, this project came INSTANTLY to mind.
Here's a close up of how I added the 2 holly images & flipped them around so that they accented the title. I colored inside the letters with one of the greens I used to color the holly leaves.
Day 1 - My True Love gave me a Partridge in a Pear tree ...
Day 2 - He gave me 2 Turtle Doves
Day 4 - Imagine my surprise when I opened the door to 4 Calling Birds
Day 6 - How about
6 Geese a Laying beautiful eggs
Day 8 - Somebody's got to do the chores, so he thoughtfully provided me with these
8 Maids a Milking
Day 10 - After they were done, the
10 Lords came a Leaping
Day 12 - And to accompany those flautists, we had 12 Drummers Drumming
Thursday, November 25, 2010
Sketching Reindeer
This digital image is from The Stamping Boutique ... after coloring with Copics, I added some glossy accents to the ornaments and his jingle collar.
If you're a fan of Unity, Tracey Malnofski, the artist-extraordinaire for The Stamping Boutique has just signed on to be one of their artists as well. Coming December 1st, her first rubber through Unity will be released in their Kit of the Month. I saw a sneak peek somewhere around here, lol ... Can't wait to see what they all come up with.
Thanks for popping in ... Tomorrow's Turkey Day, so will be busy busy busy ... Hope you all have a wonderful holiday if you celebrate.

Wednesday, November 24, 2010
Chocolate Covered Cherries
Chocolate Chip
Cherry Cobbler
Crumb Cake (aka Kraft)
Okay, I may have a favorite color combination ... I couldn't stop making cards yesterday.
My first card was done using the digital images from the My Graphic Studio available exclusively through Stampin Up. I printed the image from the Welcome Christmas set directly onto Stampin Up's Deck the Halls designer paper - seemed such a match. I printed the sentiment onto white and blended some tea dye and artichoke sponging to tie in the dp. For the card base, I used crumb cake and ran half of it through the Stampin Up Textured Wallpaper embossing folder then sponged it with cherry cobbler ink. This whole card is truly SUO - Stampin Up Only.
My second card was made with a digital image from Tiffany Doodles, colored with Copics (R22, R24, R27, YG95, YG97, YG99, BG10). I added a sentiment from the Stampin Up digital file from Come to Bethlehem. I may have to get a few more packs of this Deck the Halls designer paper - it's SO my style, and I had a very hard time cutting some of it because of what was on the reverse side - "WAIT, I might use it for ..." I finished with some red rhinestones and red ribbon threaded through a slot punch.
I actually love this third card - maybe the designer paper tipped me over the edge? It's digital ... and I can't remember where I got it, will have to look through my files to see where I have it stashed in the computer. It looks so close to crumb cake/kraft, tho, that I had to go for it. The digital image is once again from Tiffany Doodles' Christmas Holly Set, colored with Copics (R22, R24, R27, YG95, YG97, YG99, Y0000). I used the long oval & scalloped oval nesties then popped it up for dimension. The sentiment is from the Stampin Up digital set Welcome Christmas. I used an exacto to cut out then sponged the edges with cherry cobbler. This ribbon ws dyed by holding it down onto the cherry cobbler stamp pad with a sponge and pulling the ribbon through underneath the sponge, flipping it over and doing some more. It's a synthetic ribbon, harder to take the dye than the SU ribbon, but did the trick in the pinch.
For my fourth (and final card for yesterday) attempt, I used another Tiffany Doodles digital image from her new Snowman Set and colored with Copics (R22, R24, R27, E40, E41, E42, E43). The sentiment is from Stampin Up's Bells 'n Boughs, stamped in chocolate. Once again, Deck the Halls designer paper comes through.
Saturday, November 20, 2010
This is your first stop along the way. You should have been directed here from The Stamping Boutique's Challenge Blog. While you were there, you probabLy noticed the freebie digital image that Tracey so kindly donated. The following is a List of the Blog Hop Hostesses in order of their appearance:
There's a secret letter in this post. Let's see if you can find it. Along the way, each of the other hostesses will also be sporting a secret Letter. Collect them all and when you arrive at Amanda's blog, she will give you her email address for you to post the secret word from all the previous blogs in the Comments. In order to be eligible to be entered for Tracey's prize, however, you'll need to enter comments on each hostesses blog, so Leave some love as you're passing through.
Tracey Malnofski will be donating two digitaL images of your choice to the lucky winner.
Both of these cards were coLored with Copics. For the first one, I morphed the two images together to create a couple.
Wishing you all a wonderful Thanksgiving.
It's a great time to to get together with family and friends and be thankfuL for each other.
Thursday, November 18, 2010
The Stamping Boutique BLOG HOP coming up
The Stamping Boutique and Tiffany Doodles
This first one was made for the Color Me Creative Challenge #7 - Be inspired by this photograph of wonderful ornaments. We're ALL ready for the holidays, right? ("not I", says Collette)
And, The Stamping Boutique is sponsoring it - 10 (count 'em) T-E-N free digital images from Tracey's wonderful line to one lucky winner. Tracey is offering her Serenity angel to use, if you're so inclined, so hop over to Color Me Creative and shoot Suzanne Dean a note and she'll get the image out to you.
I was inspired by the hot pink ornament in the front glass as well as the blues and greenery. This Serenity image from Tracey's Enchantment line was colored with Copics. I added some clear glitter gel pen to the sparkles and wings and some cotton candy Stickles before cutting with my Creative Memories oval cutter. Nesties just didn't fit here. I used a slot punch to thread this grosgrain polka dot ribbon through and around the background paper which was created using the wax resist technique. I corner punched the background, popped the image panel up on dimensionals and called it a day for this baby.
For this second card, I followed the Splitcoast Stamper's Ways to Use it technique for today - Use brown as a predominant factor in your card. I've had this birdhouse from Tiffany Doodles on my table for ages and thought it would work for what I was looking for - sure enough - card came out as I had envisioned.
I colored this digital image with Copics and then used a corner ticket punch for the image and chocolate mat before popping up for dimension. I added some ribbon hardware to thread this chocolate satin ribbon through. I found these wire brads awhile ago and thought this orange flower brad worked perfect. What do you think?
Wednesday, November 17, 2010
Fun with Tiffany Doodles
I used Stampin' Up's Cherry Cobbler and Always Artichoke for matting and card base, along with their wonderful Deck the Halls designer paper - Love, love, love it! The mouse and sentiment were popped up for dimension.
For this second card, I repeated an ornament, staggering them. They were colored with Copics then zig-zagged with some diamond Stickles. I finished off by adding pearls to the scalloped border, sentiment disc and the tops of the ornaments. I like the crisp feel to this one. Actually, I think I want to get some ornaments that look like these for my tree this year. The mats are blue bayou (nearing the end) and perfect plum. Not sure where the dp came from. This card actually measures 4x6.
I'm submitting these cards to Tiffany for consideration for her Design Team.
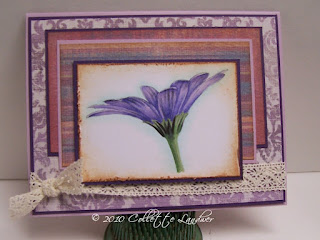
Sneaking in a 3rd card from Tiffany Doodles ... I love this flower and the one called Sketch03 ... such a joy to color. Since purple happens to be my favorite color, well ... 'nuff said. I'm actually very critical of my own work, but I have to say I think this one turned out quite well.
Funny purple story ... went to Party City today to look for Harry Potter paraphernalia (tomorrow IS the midnight premiere, dontcha know) ... as we're walking down an aisle, I saw some purple sunglasses (yes, cheap, but still ... ) I went to pick them up and my darling 15 year old says "Absolutely Not" ... "What?" She says "You're wearing purple pants ... you have on a purple sweater ... you're even carrying your Vera Bradley purple wallet ... I'm going to pretend I don't know you if you even pick up those glasses" ... Suffice it to say ... I have to revamp the wardrobe ... If it's not purple or black, it probably says "BULLDOGS Cheer" on it.
Valentine's Day Blog Candy Winner ...
And the winner for the Blog Candy posted on Saturdays for the
is ...
Tuesday, November 16, 2010
Some new Stamping Boutique images
This first card was made for the Stamps R Us Challenge this week - use Sparkles and Scallops. This is one of Tracey's new designs from The Stamping Boutique, Chubby Snowman. After coloring him, I added some diamond Stickles to the border. I also used a purple Spica glitter pen for the faux stitch lines on the green scalloped trim.
This second card was made using another new digital from Tracey's store, Audrey on Presents. I love these Audrey images - coloring them is so fun. This put me in mind of several pictures I have over the years of my beautiful daughter on Christmas morning ... Thanks, Tracey!
I used the computer for the sentiment, added some Bakers Twine to look a little bit like peppermint sticks before matting the image up for dimension.
While I do like the cards that are 3D, I guess my practical side wins out - I'm always thinking "How will this travel through the post?
Hope you enjoy them. Hop on over to The Stamping Boutique to see all Tracey's wonderful collections.
Saturday, November 13, 2010
Operation Write Home - VALENTINE'S Day Blog Hop
 Today, Operation Write Home is hosting the 'Be My Valentine' Blog Hop to gather Valentine cards that the troops can send home to their families and loved ones.
If you've come from Raissa Stamps' blog, you're on the right track. If not, please head back to the beginning at the OWH Stars and Stamps blog to start at the beginning. There will be lots of fabulous samples, some tutorials and even a bit of blog candy here and there, so make sure you see it all! For those of you that may not know, Operation Write Home collects cards from card-makers across the United States to send to our troops that are not at home - so that they, too, can send cards to family and friends. Today's Blog Hop is dedicated to Valentine's Day - something sweet to send to a sweetheart or a child here at home. Yes, they're that far ahead. It takes time to get the cards to one of the regional locale's to send them over to the troops. The deadline is set for January 7th, but I'd try to get them out even sooner than that. Please note, OWH has asked that no more Christmas Cards be sent at the present time as they have already gone postal to the troops. Please save them for next year.)
My second card was made with another digital image from The Stamping Boutique , AJ with Sign. He, too, was colored with Copics. I hand-wrote the sentiment. The tan background is dp that I ran through the Stampin' Up Textured Wallpaper embossing folder then sponged over with red ink. I used Nesties oval and oval scallop dies on the image, popped it up for dimension, then finished the whole thing off with some pink and red buttons.
 My third card is yet another digital image from The Stamping Boutique, Valentine House, once again, colored with Copics. I made the background dp by randomly stamping with red on white from the Stampin' Up's Elegant Embroidery set. All layers were matted on real red. I finished off with some crystal accents on the hanging heart and windows; a red satin ribbon and a Hero Arts sentiment punched with the Creative Memories Heart punch set. There are some red rhinestones on the sentiment label and the corners of the image panel.
 Tuesday, November 02, 2010
SCS's Technique Lovers Challenge - Embedded Embossing
Holly called DIBS on this technique since she couldn't find it showcased anywhere else:
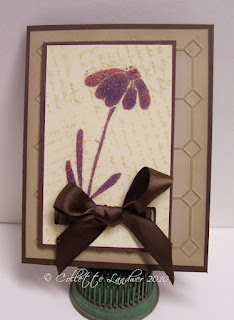
1. I took vanilla card stock and stamped a script image randomly in Stampin Up's River Rock.
2. I then layered 3 layers of clear embossing powder over Versamark ink, coating evenly.
3. I stamped the Penny Black "Blush" image with Versamark over the cooled 'tile' then poured some Cloissone embossing powder (kind of a red, blue verigated color) and heatset.
4. The Cloissone image just melted into the layer of clear embossing powder.
I first tried this with a pale pink embossing powder - Let me just explain - there's a REASON you won't see that example. It just came out a hot mess. I think this technique looks much better with a darker embossing powder on the finished image.


